
티스토리 뷰
-------------- Istio --------------
- Istio 설치
- curl -L https://istio.io/downloadIstio | ISTIO_VERSION=1.7.5 TARGET_ARCH=x86_64 sh -
"(istio v1.7.1은 Kubernetes 1.16이상에서만 동작)" - cd istio-1.7.1
- export PATH=$PWD/bin:$PATH
- istioctl install --set profile=demo --set hub=gcr.io/istio-release
"note : there are other profiles for production or performance testing." - Istio 모니터링 툴(Telemetry Applications) 설치
-
vi samples/addons/kiali.yaml
-
4라인의 apiVersion: apiextensions.k8s.io/v1beta1을 apiVersion: apiextensions.k8s.io/v1으로 수정
-
kubectl apply -f samples/addons
-
kiali.yaml 오류발생시, 아래 명령어 실행
kubectl apply -f https://raw.githubusercontent.com/istio/istio/release-1.7/samples/addons/kiali.yaml
-
모니터링(Tracing & Monitoring) 툴 설정
- Monitoring Server - Kiali
- 기본 ServiceType 변경 : ClusterIP를 LoadBalancer 로…
- kubectl edit svc kiali -n istio-system
- :%s/ClusterIP/LoadBalancer/g
- :wq!
- 모니터링 시스템(kiali) 접속 : EXTERNAL-IP:20001 (admin/admin)
- 기본 ServiceType 변경 : ClusterIP를 LoadBalancer 로…
- Tracing Server - Jaeger
- 기본 ServiceType 변경 : ClusterIP를 LoadBalancer 로…
- kubectl edit svc tracing -n istio-system
- :%s/ClusterIP/LoadBalancer/g
- :wq!
- 분산추적 시스템(tracing) 접속 : EXTERNAL-IP:80
- 기본 ServiceType 변경 : ClusterIP를 LoadBalancer 로…
- Monitoring Server - Kiali
-
- 설치확인
- kubectl get all -n istio-system
-
How to enable Istio
-
- Whenever deploying to Cluster, Using pre-processing command “Istio kube-inject”
- kubectl apply -f <(istioctl kube-inject -f Deployment.yml) -n istio-test-ns
- Using Istio-enabled Namespace.
- e.g. kubectl label namespace tutorial istio-injection=enabled
-
Lab. Istio Tutorial 셋업
- Git repository에서 Tutorial 리소스 가져오기
- cd ~
- mkdir git
- cd git
- git clone https://github.com/redhat-developer-demos/istio-tutorial
- cd istio-tutorial
- 네임스페이스 생성
- kubectl create namespace tutorial
- Customer Service 배포
- kubectl apply -f <(istioctl kube-inject -f customer/kubernetes/Deployment.yml) -n tutorial
- kubectl describe pod (Customer Pod) -n tutorial 로 생성확인
- kubectl create -f customer/kubernetes/Service.yml -n tutorial
- kubectl apply -f <(istioctl kube-inject -f customer/kubernetes/Deployment.yml) -n tutorial
- Istio Gateway 설치 및 Customer 서비스 라우팅(VirtualService) 설정
- cat customer/kubernetes/Gateway.yml
- kubectl create -f customer/kubernetes/Gateway.yml -n tutorial
- (Istio-IngressGateway를 통한 Customer 서비스 확인)
- kubectl get service/istio-ingressgateway -n istio-system
- 해당 EXTERNAL-IP가 Istio Gateway 주소
- Customer 서비스 호출 :"http://(istio-ingressgateway IP)/customer"
- Preference, Recommendation-v1 Service 배포
- kubectl apply -f <(istioctl kube-inject -f preference/kubernetes/Deployment.yml) -n tutorial
- kubectl create -f preference/kubernetes/Service.yml -n tutorial
- kubectl apply -f <(istioctl kube-inject -f recommendation/kubernetes/Deployment.yml) -n tutorial
- kubectl create -f recommendation/kubernetes/Service.yml -n tutorial
Lab. Istio - Traffic Routing
- Simple Routing
-
(pwd 로 현 위치가 /istio-tutorial/ 인지 확인)
-
(recommendation 서비스 추가 배포: v2)
- kubectl apply -f <(istioctl kube-inject -f recommendation/kubernetes/Deployment-v2.yml) -n tutorial
-
서비스 호출
- 브라우저에서 Customer 서비스(Externl-IP:8080 접속) 호출
- F5(새로고침)를 10회 이상 클릭하여 다수의 요청 생성
-
Routing 결과 확인 - Kiali(Externl-IP:20001) 접속
-
(Recommendation v.2 서비스 Scale Out)
-
(서비스의 v2 의 replica 를 2로 설정)
- kubectl scale --replicas=2 deployment/recommendation-v2 -n tutorial
- kubectl get po -n tutorial
-
Customer 서비스를 10회 이상 F5(새로고침)하여 서비스 호출
-
Routing 결과 확인 - Kiali(Externl-IP:20001) 접속
- kubectl apply -f <(istioctl kube-inject -f recommendation/kubernetes/Deployment-v2.yml) -n tutorial
-
- Advanced Routing
- 정책(VirtualService, DestinationRule) 설정
- (현, 정책 확인)
- kubectl get VirtualService -n tutorial -o yaml
- kubectl get DestinationRule -n tutorial -o yaml
- (사용자 선호도에 따른 추천 서비스 라우팅 정책 설정)
- (VirtualService, DestinationRule 설정, v2로 100% 라우팅)
- kubectl create -f istiofiles/destination-rule-recommendation-v1-v2.yml -n tutorial
- kubectl create -f istiofiles/virtual-service-recommendation-v2.yml -n tutorial
- (설정정책 확인)
- kubectl get VirtualService -n tutorial -o yaml
- kubectl get DestinationRule -n tutorial -o yaml
- (서비스 확인)
- 브라우저에서 Customer 서비스(Externl-IP:8080 접속)호출
- Kiali(Externl-IP:20001), Jaeger(External-IP:80)에서 모니터링
- (현, 정책 확인)
- 가중치 기반 스마트 라우팅 (Canary Deployment)
- (recommendation 서비스 v1의 가중치를 100으로 변경)
- kubectl replace -f istiofiles/virtual-service-recommendation-v1.yml -n tutorial
- (서비스 호출 및 Kiali(Externl-IP:20001)에서 모니터링)
- (VirtualService 삭제 시, Round-Robin 방식으로 동작)
- kubectl delete -f istiofiles/virtual-service-recommendation-v1.yml -n tutorial
- Canary 라우팅 비율별 배포 정책 예시
- (90 : 10)
- kubectl apply -f istiofiles/virtual-service-recommendation-v1_and_v2.yml -n tutorial
- (75 : 25)
- kubectl replace -f istiofiles/virtual-service-recommendation-v1_and_v2_75_25.yml -n tutorial
- 삭제
- kubectl delete dr recommendation -n tutorial
- #kubectl delete vs recommendation -n tutorial
- kubectl scale --replicas=1 deployment/recommendation-v2 -n tutorial
- (recommendation 서비스 v1의 가중치를 100으로 변경)
- Client 브라우저 유형별 스마트 라우팅
- Firefox 브라우저로 접속 시, v2로 라우팅되도록 설정
- kubectl apply -f istiofiles/destination-rule-recommendation-v1-v2.yml -n tutorial
- kubectl apply -f istiofiles/virtual-service-firefox-recommendation-v2.yml -n tutorial (파이어폭스일때만 v2로 접속)
- (Firefox 브라우저와 다른 브라우저에서 접속 확인)
- (Browser 환경이 지원되지 않을 경우,)
- curl -A Safari Externl-IP:8080
- curl -A Firefox Externl-IP:8080
- 삭제
- kubectl delete dr recommendation -n tutorial
- kubectl delete vs recommendation -n tutorial
- Firefox 브라우저로 접속 시, v2로 라우팅되도록 설정
- 정책(VirtualService, DestinationRule) 설정
- 헬름 버전이 3.xx 일때 카프카 설치 방법
kubectl --namespace kube-system create sa tiller # helm 의 설치관리자를 위한 시스템 사용자 생성
kubectl create clusterrolebinding tiller --clusterrole cluster-admin --serviceaccount=kube-system:tiller
helm repo add incubator https://charts.helm.sh/incubator
helm repo update
kubectl create ns kafka helm install my-kafka --namespace kafka incubator/kafka
---------- 실전 -----------------
<Order 배포>
1. mall/order로 이동
2. 해당 MSA를 maven으로 빌드
mvn package
az acr build --registry user0909 --image user0909.azurecr.io/order:v1 .
kubectl create deploy order --image=user0909.azurecr.io/order:v1 -n tutorial
kubectl expose deploy order --type=ClusterIP --port=8080 -n tutorial
kubectl -n kafka exec -ti my-kafka-0 – /usr/bin/kafka-console-consumer --bootstrap-server my-kafka:9092 --topic mall --from-beginning
kubectl run siege --image=apexacme/siege-nginx -n tutorial
kubectl exec -it siege -n tutorial -c siege -- /bin/bash
해당 bash 내부(siege)로 들어가서 아래와 같이 주문
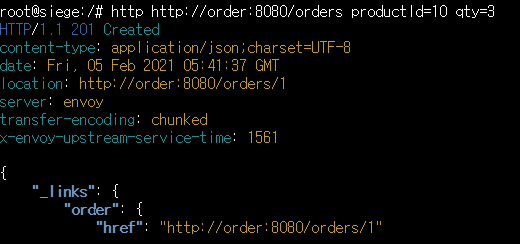
http http://order:8080/orders productId=10 qty=3
<delivery 배포>
mvn package
az acr build --registry user0909 --image user0909.azurecr.io/delivery:v1 .
kubectl create deploy delivery --image=user0909.azurecr.io/delivery:v1 -n tutorial
kubectl expose deploy delivery --type=ClusterIP --port=8080 -n tutorial
<customer 배포>
mvn package
az acr build --registry user0909 --image user0909.azurecr.io/customercenter:v1 .
kubectl create deploy customercenter --image=user0909.azurecr.io/customercenter:v1 -n tutorial
kubectl expose deploy customercenter --type=ClusterIP --port=8080 -n tutorial
배포한것들 조회
kubectl get all -n tutorial
<gateway 배포>
mvn package
az acr build --registry user0909 --image user0909.azurecr.io/gateway:v1 .
kubectl create deploy gateway --image=user0909.azurecr.io/gateway:v1 -n tutorial
kubectl expose deploy gateway --type=LoadBalancer --port=8080 -n tutorial
kubectl exec -it siege -c siege -n tutorial -- /bin/bash
고객센터
http http://customercenter:8080/mypages
http http://order:8080/orders/1
주문
http http://order:8080/orders productId=10 qty=3
삭제
http DELETE 20.194.17.235:8080/orders/2
- Order 서비스 Timeout 설정 (클라우드 내에서 Order 서비스로 라우팅시) kubectl apply -f - <<EOF apiVersion: networking.istio.io/v1alpha3 kind: VirtualService metadata: name: vs-order-network-rule namespace: tutorial spec: hosts: - order http: - route: - destination: host: order timeout: 3s EOF
- 부하테스트 툴(Siege) 설치 및 Order 서비스 Load Testing
- kubectl run siege --image=apexacme/siege-nginx -n tutorial
- kubectl exec -it siege -c siege -n tutorial --/bin/bash
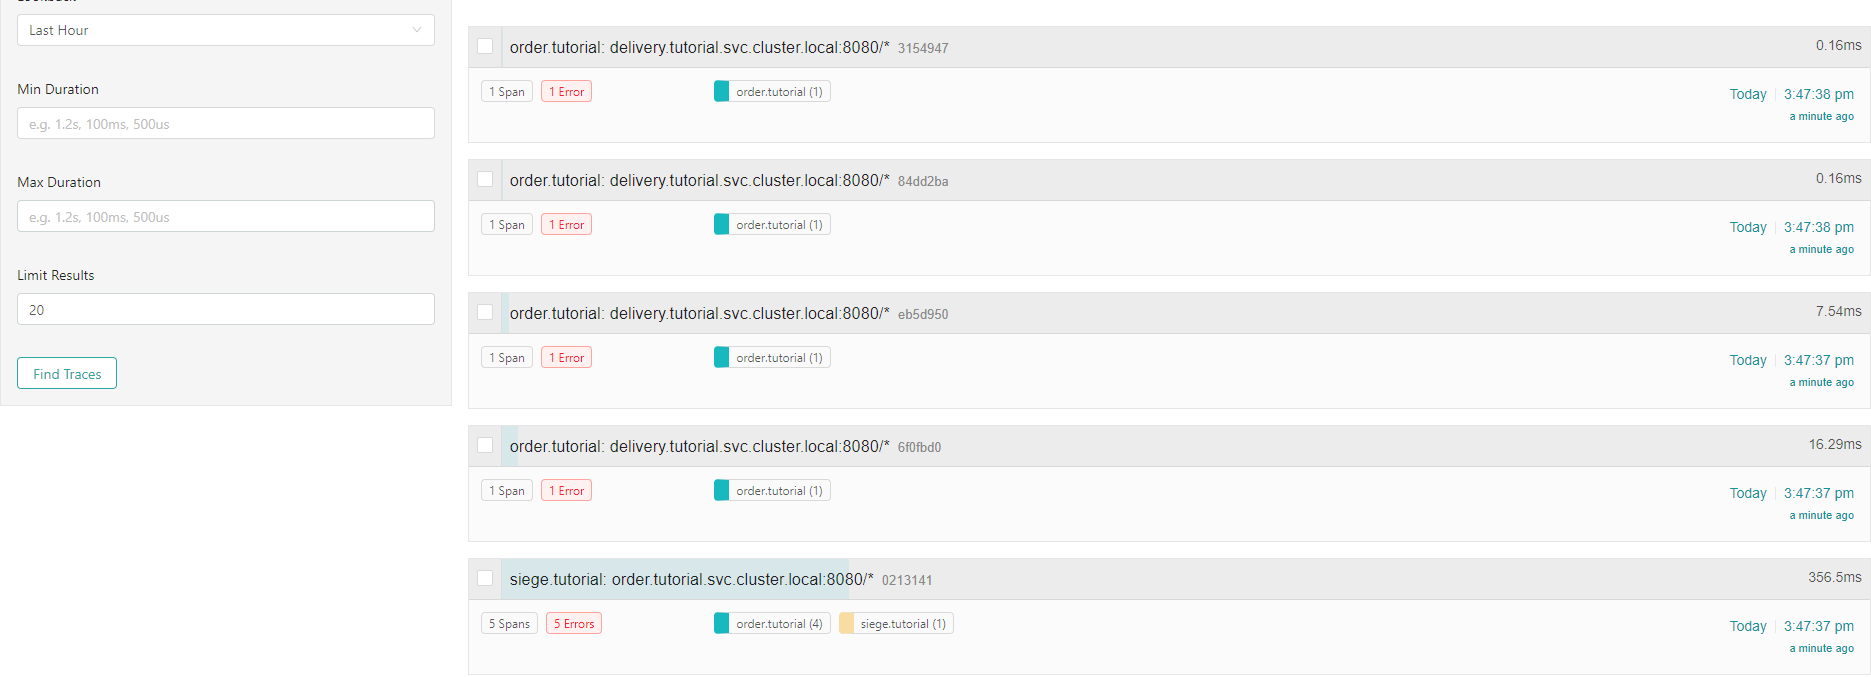
- siege -c30 -t20S -v --content-type "application/json" 'http://order:8080/orders POST {"productId": "1001", "qty":5}'
504에러가 종종 발생하면서 실패함.
Scale을 0으로 만들어서 동작 안하도록 설정
kubectl scale deploy delivery --replicas=0 -n tutorial
504에러여도 다시 Retry하도록
kubectl apply -f - <<EOF apiVersion: networking.istio.io/v1alpha3 kind: VirtualService metadata: name: vs-order-network-rule namespace: tutorial spec: hosts: - order http: - route: - destination: host: order timeout: 3s retries: attempts: 3 perTryTimeout: 2s retryOn: 5xx,retriable-4xx,gateway-error,connect-failure,refused-stream EOF
241번 productId를 삭제하려고 시도
http DELETE http://order:8080/orders/241 ->

위에서 5번의 Retry를 확인할 수 있음.
<Istio 설정>
kubectl create namespace istio-cb-ns
kubectl label namespace istio-cb-ns istio-injection=enabled
kubectl apply -f - <<EOF
    apiVersion: v1
    kind: Pod
    metadata:
      name: hello-server-1
      namespace: istio-cb-ns
      labels:
        app: hello
    spec:
      containers:
      - name: hello-server-1
        image: docker.io/honester/hello-server:latest
        imagePullPolicy: IfNotPresent
        env:
        - name: VERSION
          value: "v1"
        - name: LOG
          value: "1"
---
    apiVersion: v1
    kind: Pod
    metadata:
      name: hello-server-2
      namespace: istio-cb-ns
      labels:
        app: hello
    spec:
      containers:
      - name: hello-server-2
        image: docker.io/honester/hello-server:latest
        imagePullPolicy: IfNotPresent
        env:
        - name: VERSION
          value: "v2"
        - name: LOG
          value: "1"
        - name: RANDOM_ERROR
          value: "0.2"
---
    apiVersion: v1
    kind: Service
    metadata:
      name: svc-hello
      namespace: istio-cb-ns
      labels:
        app: hello
    spec:
      selector:
        app: hello
      ports:
      - name: http
        protocol: TCP
        port: 8080
EOF
'Cloud > Cloud 교육' 카테고리의 다른 글
| MSA 이해 (0) | 2022.04.08 |
|---|---|
| 클라우드 정리(2) (0) | 2021.02.04 |
| 클라우드 정리(1) (0) | 2021.02.03 |
- Total
- Today
- Yesterday
- MSA란?
- github
- GIT
- 일반함수
- svn
- Post
- NavLink
- MSA
- MicroService
- node.js
- 화살표함수
- put
- 협업
- 원격저장소
- bitbucket
- monolithic
- 오류해결
- 별코딩
- HTTP 요청 메서드
- React
- git clone
- git 기초
- 브랜치란
- git branch
- Branch
- 형상관리
- HTTP
- git명령어
- 코드리뷰
- Link
| 일 | 월 | 화 | 수 | 목 | 금 | 토 |
|---|---|---|---|---|---|---|
| 1 | 2 | 3 | 4 | 5 | 6 | 7 |
| 8 | 9 | 10 | 11 | 12 | 13 | 14 |
| 15 | 16 | 17 | 18 | 19 | 20 | 21 |
| 22 | 23 | 24 | 25 | 26 | 27 | 28 |
| 29 | 30 |